Create an Array Around ELLIPSE in AutoCAD
Introduction
AutoCAD is a powerful software tool used by professionals in various fields, including architecture, engineering, and design. One of the essential features of AutoCAD is the ability to create arrays, which allow you to duplicate and distribute objects in a specified pattern. In this article, we will explore how to create an array around an ellipse in AutoCAD, providing step-by-step instructions and valuable insights into this process.
Table of Contents
What is an Array in AutoCAD?
Before we dive into an array around an ellipse in AutoCAD, let’s first understand what an array is in AutoCAD. An array is a collection of objects that are arranged in a pattern, allowing you to replicate and distribute them efficiently. It saves time and effort, especially when creating multiple copies of the same object or creating repetitive patterns.
Arrays in AutoCAD can be linear, polar, or path-based. A linear array distributes objects along a straight line, a polar array arranges objects around a center point in a circular pattern, and a path-based array distributes objects along a specified path. In our case, we will focus on creating a polar array around an ellipse in AutoCAD.
Creating an Array Around ELLIPSE in AutoCAD
To create an array around an ellipse in AutoCAD, follow the steps below:
Draw an Ellipse
- Open AutoCAD and start a new drawing.
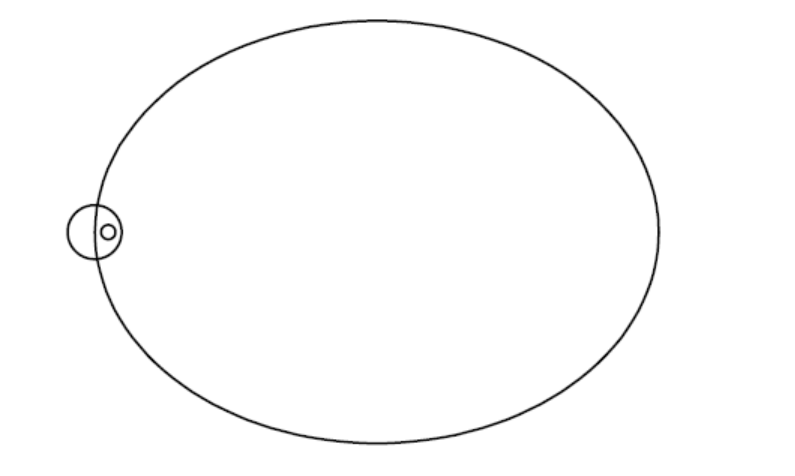
- Choose the Ellipse tool from the Draw panel or type “EL” in the command line and press Enter.
- Specify the center point of the ellipse by clicking on the desired location in the drawing area.
- Specify the major axis endpoint by moving the cursor to set the length and orientation of the ellipse.
- Press Enter to complete the ellipse.
Set the Array Parameters
- Select the ellipse you just created by clicking on it.
- Type “ARRAY” in the command line and press Enter to access the Array command.
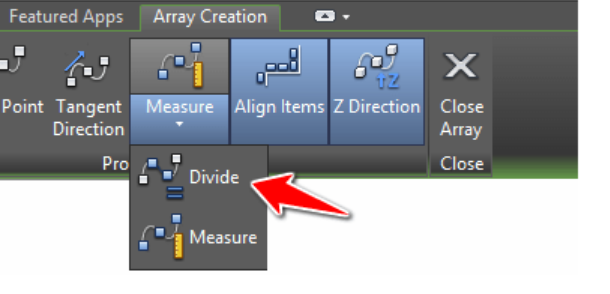
- Choose the “Polar” option to create a polar array.
- AutoCAD will prompt you to specify the center point of the array. Click on the center of the ellipse.
- Next, specify the number of items in the array. Enter the desired number and press Enter. For example, if you want ten copies, enter “10.”
- AutoCAD will ask for the angle to fill. Enter the angle at which you want the objects to fill the ellipse. For example, if you want the objects to fill a complete circle, enter “360.”
- Press Enter to complete the array creation.
Creating an Array Around ELLIPSE in AutoCAD
Customize the Array
Once you have created the array, you can further customize it according to your specific requirements. AutoCAD provides various options to adjust the spacing, rotation, and scaling of the objects within the array.
To modify the array parameters:
- Select the array you just created by clicking on it.
- Right-click and choose “Edit Array” from the context menu.
- A dialog box will appear, allowing you to adjust the array properties. Here, you can change the number of items, spacing, rotation angle, and scaling factor.
- Make the desired modifications and click “OK” to apply the changes.
Tips for Creating an Array Around ELLIPSE in AutoCAD
When creating an array around an ellipse in AutoCAD, there are a few tips and tricks that can help you achieve the best results:
- Use Object Snaps: Object snaps are invaluable when creating arrays. They allow you to precisely snap to key points on existing objects, such as the endpoints of lines or the center of circles. By enabling object snaps, you can ensure accurate placement and alignment of the array around the ellipse.
- Experiment with Rotation Angles: The rotation angle you specify for the array determines the spacing and orientation of the objects around the ellipse. Don’t hesitate to try different rotation angles to achieve the desired arrangement. You can always edit the array later and fine-tune the rotation angle to perfection.
- Combine Multiple Arrays: AutoCAD allows you to combine multiple arrays to create complex patterns. For example, you can create a polar array around the ellipse and then create another linear array based on the objects in the polar array. This technique opens up endless possibilities for creating intricate designs efficiently.
- Utilize Array Actions: AutoCAD provides additional array actions that allow you to manipulate and modify arrays after they are created. These actions include stretching, scaling, rotating, and mirroring arrays. Experimenting with these actions can help you achieve unique and visually appealing designs.
- Leverage Dynamic Blocks: If you’re working with blocks in AutoCAD, consider creating dynamic blocks for your array objects. Dynamic blocks allow you to define custom parameters and actions, enabling you to manipulate the array dynamically. This can be particularly useful when you need to quickly adjust the array on the fly.
By applying these tips, you can take your array creation skills to the next level and unleash your creativity in AutoCAD.
FAQs about Creating an Array Around ELLIPSE in AutoCAD
Q1: Can I create an array around any shape in AutoCAD?
Yes, you can create an array around various shapes in AutoCAD, including ellipses, circles, rectangles, and polygons. The arrayfeature in AutoCAD is versatile and allows you to create arrays around different objects.
Q2: Can I modify the array after creating it?
Yes, you can easily modify the array after creating it. AutoCAD provides options to adjust the number of items, spacing, rotation, and scaling of the objects within the array. Simply select the array, right-click, and choose “Edit Array” to access the array properties dialog box.
Q3: Is it possible to create a path-based array around an ellipse?
Yes, AutoCAD allows you to create a path-based array around an ellipse. Instead of choosing the “Polar” option in the Array command, select the “Path” option. Then, specify the desired path for the array to follow, and AutoCAD will distribute the objects accordingly.
Q4: Can I create arrays with different object types in AutoCAD?
Yes, you can create arrays with different types of objects in AutoCAD. The array feature works with various object types, such as lines, arcs, blocks, and even 3D objects. You can select multiple objects and create an array based on your needs.
Q5: Can I control the spacing between objects in the array?
Yes, AutoCAD provides options to control the spacing between objects in the array. In the array properties dialog box, you can adjust the spacing value to increase or decrease the gap between objects. Experimenting with different spacing values will help you achieve the desired result.
Q6: Can I create a dynamic array around an ellipse?
Yes, you can create a dynamic array around an ellipse in AutoCAD. The dynamic array feature allows you to modify the array on the fly by dragging specific grips. This way, you can easily adjust the array’s size, rotation, and other parameters interactively.
Conclusion
Creating an array around an ellipse in AutoCAD is a valuable technique that can significantly improve your productivity when working on repetitive design tasks. By following the step-by-step instructions provided in this article, you can easily create arrays around ellipses and customize them according to your specific requirements. Remember to experiment with different array parameters to achieve the desired effect.
AutoCAD offers a wide range of powerful features, and mastering array creation is just one of the many skills that can enhance your proficiency in this software. Keep exploring AutoCAD’s capabilities, and you’ll discover new ways to streamline your design workflow and bring your ideas to life.
Hello, I’m Cansu, a professional dedicated to creating Excel tutorials, specifically catering to the needs of B2B professionals. With a passion for data analysis and a deep understanding of Microsoft Excel, I have built a reputation for providing comprehensive and user-friendly tutorials that empower businesses to harness the full potential of this powerful software.
I have always been fascinated by the intricate world of numbers and the ability of Excel to transform raw data into meaningful insights. Throughout my career, I have honed my data manipulation, visualization, and automation skills, enabling me to streamline complex processes and drive efficiency in various industries.
As a B2B specialist, I recognize the unique challenges that professionals face when managing and analyzing large volumes of data. With this understanding, I create tutorials tailored to businesses’ specific needs, offering practical solutions to enhance productivity, improve decision-making, and optimize workflows.
My tutorials cover various topics, including advanced formulas and functions, data modeling, pivot tables, macros, and data visualization techniques. I strive to explain complex concepts in a clear and accessible manner, ensuring that even those with limited Excel experience can grasp the concepts and apply them effectively in their work.
In addition to my tutorial work, I actively engage with the Excel community through workshops, webinars, and online forums. I believe in the power of knowledge sharing and collaborative learning, and I am committed to helping professionals unlock their full potential by mastering Excel.
With a strong track record of success and a growing community of satisfied learners, I continue to expand my repertoire of Excel tutorials, keeping up with the latest advancements and features in the software. I aim to empower businesses with the skills and tools they need to thrive in today’s data-driven world.
Suppose you are a B2B professional looking to enhance your Excel skills or a business seeking to improve data management practices. In that case, I invite you to join me on this journey of exploration and mastery. Let’s unlock the true potential of Excel together!
https://www.linkedin.com/in/cansuaydinim/

