Mastering Basic Drawing Commands in AutoCAD
Introduction
In the world of computer-aided design (CAD), AutoCAD has emerged as one of the most popular and powerful software tools. With its wide range of features and capabilities, AutoCAD enables architects, engineers, and designers to create intricate and precise drawings. However, to fully harness the potential of AutoCAD, it is essential to master the basic drawing commands. This article will explore these fundamental Basic Drawing Commands in AutoCAD and provide detailed insights into their usage and functionality. Whether you’re a beginner or an experienced user, this comprehensive guide will help you confidently enhance your skills and navigate the world of AutoCAD.
Table of Contents
Getting Started with AutoCAD
Understanding the Interface
Before delving into the basic drawing commands, it is crucial to familiarize yourself with the AutoCAD interface. The interface consists of various elements, including the ribbon, the command line, and the drawing area. The ribbon provides access to a wide range of tools and commands, making navigating the software easier. Also, the command line allows you to input commands and receive feedback, while the drawing area is where you create and manipulate your drawings. Also, by effectively understanding and utilizing these interface components, you can streamline your workflow and maximize your productivity in AutoCAD.
Creating a New Drawing
Creating a New Drawing
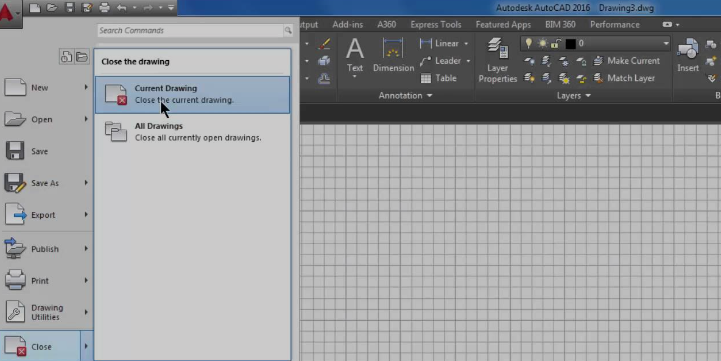
To begin working on a new drawing in AutoCAD, follow these simple steps:
- Launch AutoCAD by double-clicking the desktop shortcut or selecting it from the Start menu.
- Once AutoCAD is open, you will be prompted to choose a template or create a new drawing from scratch. Select the appropriate option based on your requirements.
- Specify the drawing units, such as inches, millimeters, or feet, depending on your preference.
- Choose the drawing scale and set other parameters like paper size and orientation if necessary.
- Click “OK” to create a new drawing.
Mastering Basic Drawing Commands in AutoCAD
Mastering Basic Drawing Commands in AutoCAD
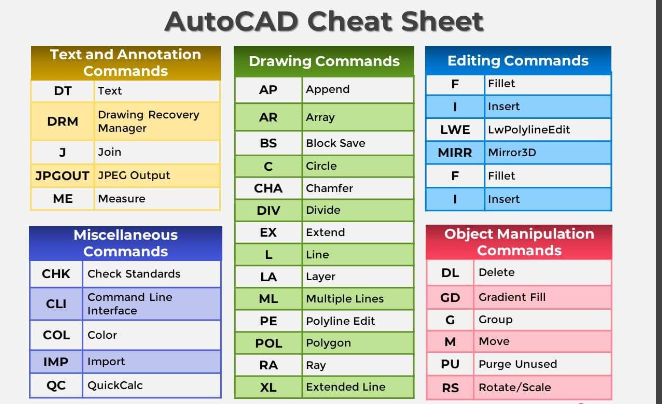
Now that we have covered the basics, let’s dive into the core drawing commands in AutoCAD. Also, these commands form the foundation of any drawing project and are essential for creating precise and accurate designs.
Line Command
Line Command
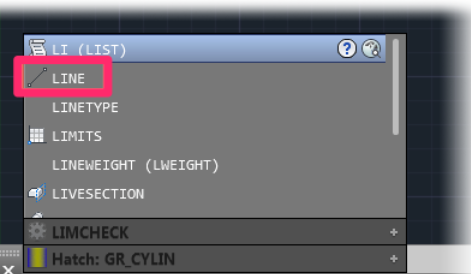
The Line command is perhaps the most fundamental and frequently used command in AutoCAD. Also, it allows you to draw straight lines between two points. To use the Line command, follow these steps:
- Type “LINE” in the command line or select the Line tool from the ribbon.
- Specify the first point by clicking anywhere in the drawing area.
- Specify the second point by clicking a different location.
- Repeat the process to create additional line segments if needed.
The Line command offers various options for creating lines with specific lengths, angles, and orientations. Also, you can easily create complex geometric shapes and structures in AutoCAD by mastering this command.
Circle Command
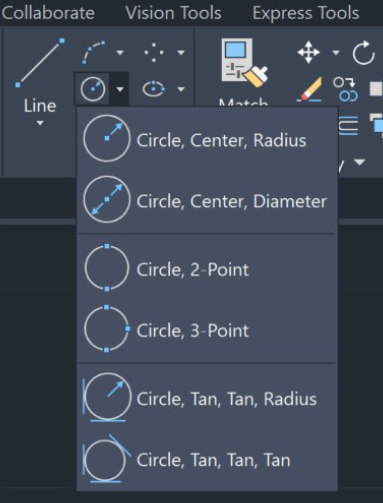
Circle Command
The Circle command enables you to draw circles of different sizes and dimensions. Also, to create a circle in AutoCAD, follow these steps:
- Type “CIRCLE” in the command line or select the Circle tool from the ribbon.
- Specify the center point of the circle by clicking anywhere in the drawing area.
- Specify the radius of the circle by entering a value or selecting two points that define the diameter.
- Press Enter to create the circle.
Like the Line command, the Circle command offers various options to create circles with specific properties, such as tangent or concentric circles. By mastering the Circle command, you can effortlessly incorporate curved elements into your drawings.
Rectangle Command
The Rectangle command allows you to draw rectangles and squares with precision. To createa rectangle in AutoCAD, follow these steps:
- Type “RECTANGLE” in the command line or select the Rectangle tool from the ribbon.
- Specify the first corner of the rectangle by clicking anywhere in the drawing area.
- Specify the opposite corner of the rectangle by clicking a different location.
- Press Enter to create the rectangle.
The Rectangle command also offers options to create rectangles with specific dimensions, and angles, or use specific methods like specifying the center point and dimensions. Also, you can easily add rectangular shapes to your drawings by mastering this command.
Arc Command
The Arc command allows you to draw arcs and circular segments in AutoCAD. To create an arc, follow these steps:
- Type “ARC” in the command line or select the Arc tool from the ribbon.
- Specify the center point of the arc by clicking anywhere in the drawing area.
- Specify the start point and end point of the arc by clicking two different locations.
- Optionally, specify the arc’s radius or length by entering a value or selecting two additional points.
- Press Enter to create the arc.
Also, the Arc command offers various options for creating different types of arcs, including arcs with specific angles, bulges, or using chord lengths. By mastering this command, you can incorporate curved elements and smooth transitions into your designs.
Polyline Command
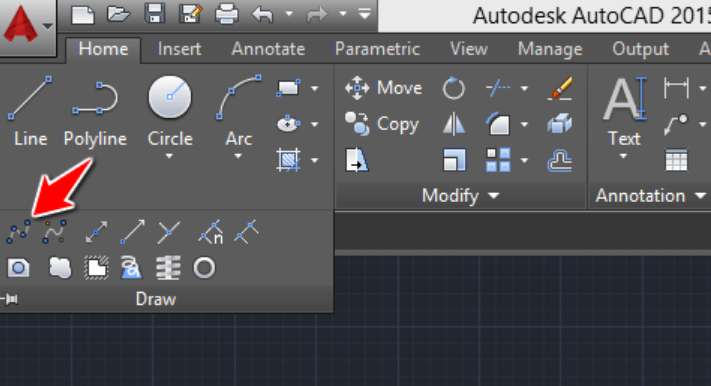
Polyline Command
The Polyline command is a versatile tool that allows you to create complex shapes consisting of multiple connected line segments. Also, to create a polyline, follow these steps:
- Type “PLINE” in the command line or select the Polyline tool from the ribbon.
- Specify the first point of the polyline by clicking anywhere in the drawing area.
- Specify the subsequent points by clicking additional locations.
- Press Enter to finish creating the polyline.
The Polyline command offers options to create closed polylines, add arcs or curves to the polyline, and edit existing polylines. By mastering this command, you can efficiently create intricate shapes and outlines in your drawings.
Hatch Command
The Hatch command allows you to fill enclosed areas or regions with patterns, solid colors, or gradients. Also, to use the Hatch command, follow these steps:
- Type “HATCH” in the command line or select the Hatch tool from the ribbon.
- Specify the boundaries of the area you want to hatch by selecting objects or defining a hatch boundary.
- Choose a hatch pattern, color, and scale from the hatch properties panel.
- Preview the hatch and adjust the settings as needed.
- Click “OK” to apply the hatch to the selected area.
The Hatch command offers a wide range of patterns and customization options, allowing you to add depth and visual interest to your drawings. By mastering this command, you can enhance the visual aesthetics of your designs.
Frequently Asked Questions (FAQs)
Q1: Can I customize the AutoCAD interface to suit my preferences?
Yes, AutoCAD allows extensive customization of the interface. You can rearrange the ribbon, create custom tool palettes, assign shortcut keys, and even create your own workspace layouts. By tailoring the interface to your needs, you can optimize your workflow and improve productivity.
Q2: Is it possible to import existing drawings or sketches into AutoCAD?
Yes, AutoCAD supports the import of various file formats, including DWG, DXF, PDF, and image files. You can import external drawings or sketches and use them as references or as a basis for further modifications. This feature facilitates collaboration and allows you to leverage existing designs.
Q3: Are there any keyboard shortcuts that can speed up my drawing process in AutoCAD?
Absolutely! AutoCAD provides a vast array of keyboard shortcuts to expedite your drawing process. By memorizing commonly used shortcuts for commands, navigation, and editing functions, you can significantly increase your efficiency and reduce the time required to perform tasks. Taking the time to learn and master these shortcuts will greatly enhance your AutoCAD experience.
Q4: Can I undo or redo actions in AutoCAD?
Yes, AutoCAD includes the undo and redo functionality, allowing you to revert or redo actions as needed. You can use the “UNDO” command or the Ctrl+Z keyboard shortcut to undo the previous action, and the “REDO” command or the Ctrl+Y keyboard shortcut to redo an action that has been undone. This feature provides flexibility and helps you correct mistakes or experiment with different design options.
Q5: How can I ensure the accuracy and precision of my drawings in AutoCAD?
AutoCAD provides various tools and features to ensure the accuracy and precision of your drawings. You can enable object snaps to easily align objects to specific points, use the grid and snap options for precise positioning, and take advantage of object tracking to maintain accurate distances and angles. Additionally, AutoCAD offers dimensioning tools to add precise measurements to your drawings, ensuring that your designs meet the required specifications.
Q6: Can I collaborate with others on AutoCAD drawings?
Yes, AutoCAD offers collaboration features that enable multiple users to work on the same drawing simultaneously. You can use the “SAVE” and “OPEN” commands to share and access drawings, employ external references to link drawings together, and utilize the markup and commenting tools to communicate and provide feedback. Collaboration in AutoCAD streamlines the design process and fosters efficient teamwork.
Conclusion
Mastering the basic drawing commands in AutoCAD is essential for anyone looking to create precise and intricate designs. By understanding and practicing commands like Line, Circle, Rectangle, Arc, Polyline, and Hatch, you can unleash the full potential of AutoCAD and enhance your drawing capabilities. Also, with the ability to customize the interface, import existing drawings, utilize keyboard shortcuts, and collaborate with others, AutoCAD empowers you to create professional-quality designs with ease and efficiency. So, dive into the world of AutoCAD, explore its vast possibilities, and take your drawing skills to new heights.
Hello, I’m Cansu, a professional dedicated to creating Excel tutorials, specifically catering to the needs of B2B professionals. With a passion for data analysis and a deep understanding of Microsoft Excel, I have built a reputation for providing comprehensive and user-friendly tutorials that empower businesses to harness the full potential of this powerful software.
I have always been fascinated by the intricate world of numbers and the ability of Excel to transform raw data into meaningful insights. Throughout my career, I have honed my data manipulation, visualization, and automation skills, enabling me to streamline complex processes and drive efficiency in various industries.
As a B2B specialist, I recognize the unique challenges that professionals face when managing and analyzing large volumes of data. With this understanding, I create tutorials tailored to businesses’ specific needs, offering practical solutions to enhance productivity, improve decision-making, and optimize workflows.
My tutorials cover various topics, including advanced formulas and functions, data modeling, pivot tables, macros, and data visualization techniques. I strive to explain complex concepts in a clear and accessible manner, ensuring that even those with limited Excel experience can grasp the concepts and apply them effectively in their work.
In addition to my tutorial work, I actively engage with the Excel community through workshops, webinars, and online forums. I believe in the power of knowledge sharing and collaborative learning, and I am committed to helping professionals unlock their full potential by mastering Excel.
With a strong track record of success and a growing community of satisfied learners, I continue to expand my repertoire of Excel tutorials, keeping up with the latest advancements and features in the software. I aim to empower businesses with the skills and tools they need to thrive in today’s data-driven world.
Suppose you are a B2B professional looking to enhance your Excel skills or a business seeking to improve data management practices. In that case, I invite you to join me on this journey of exploration and mastery. Let’s unlock the true potential of Excel together!
https://www.linkedin.com/in/cansuaydinim/

