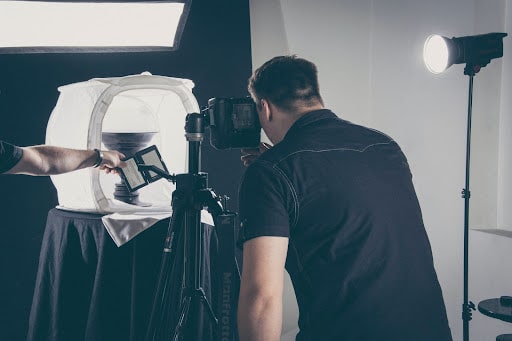
Product Photography: How to Set Up a Perfect Shot
We perceive this world mostly through our eyes. Or, paraphrasing in terms of marketing, most people evaluate your product based on the image they see most of the time. And since what is seen cannot be unseen, you have to make the most out of the first eye contact that your product and potential customer make. Photography is one of the most common and effective tools for pleasing the eye. And most e-commerce websites pay great attention to the way the goods are presented. If you want to stand toe to toe with this competition, you have to consider proper product photography as well. Here are a few tips that will help you take that one perfect shot that catches an eye with product photography setup.
Table of Contents
1. Get Good Gear
Unfortunately, this is the edge that you probably shouldn’t cut. You may have a great new smartphone with a fantastic camera, but it is still not a DSLR. Your iPhone may be enough in some situations, but if you want a consistent output of high-quality images, consider investing in a camera. You should invest in product photography setup at first.
Another tool that will dramatically improve the quality of your shot is a tripod. Where you use a camera or a phone, you should set the camera to a low aperture (a high f/stop) and slow shutter speed. But this renders taking a clear shot by hand nigh impossible. Hence, the need for a tripod, that will keep your camera steady no matter what.
2. Back it with background
Having a proper backdrop behind your products has great benefits. It makes the object look better and can make further editing easier. There are tons of options, but if you’re struggling with the choice, you can resort to the one background to rule them all – pure white. If you are willing to invest time, you can build a DIY stage yourself. If you’d rather spend some cash, then you can purchase a white sweep for photography.
3. Do the product placement
Time to let the lead performer take the stage. You have to consider camera position, lighting direction, and object property to make your product look its best. Some things, like jewelry or clothing, may benefit from having props like a mannequin. Having a friend who can do modeling is also a great asset for photoshoots.
4. Let there be light

Having ideal lighting is one of the key factors in taking a high-quality product shot. Fortunately, there are only two types of light sources available for product photography: natural and artificial. The proper can make all the difference between a flat and boring shot and a voluminous and dynamic shot. On top of that, your future self will be glad to have less work to do in post thanks to proper lighting setup.
5. Take a lot of shots for best product photography results
This is perhaps the most simple and the most effective thing any photographer can do. You just take a lot, really a lot of different shots. If you make a few dozen versions of one image, then you are likely to get a great one by chance. But once you do, you can recreate the process and settings to make all further photographs look equally superb.
6. Fix it in the post-production
No matter how good your raw shots are, you can always make them a little better. However, photo retouching may seem daunting at first, with all that advanced color adjustment and whatnot. And even later, when you realize that you have to process a bunch of images. Thankfully, there are photo editors with dedicated batch-processing features, and you can learn more about it from a guide on how to edit multiple images at once. In time, the editing will become second nature and consume way less time while providing way better results.
7. Consider the SEO
Images with a huge resolution and high dynamic range are great. But, sadly, counterproductive when it comes to e-commerce. Such images make the webpage too large and slow to load, which is off-putting. This is why you have to take into account ways to compress your images that reduce the size and preserve as much quality as possible. Another thing to consider is metadata. Adding some keywords to the image metadata can improve your search ranking after completing product photography.
8. Select Camera Angles that Emphasize the Product’s Best Features
Not only do camera angles make items intriguing. Similar to how our eyes scan items on shelves and tables at a 45-degree angle. This tactic gives the goods a more approachable and realistic appearance. like the watcher already has it.
The ideal camera angle may reveal as much of the product as possible while also adding depth. Some of the elements might not be seen in photos taken top-down or directly on.
Your choice of camera angle may expand some goods and provide unusual textures. Try many angles and pick the one that best displays the advantages of the product.
Wrapping Up on Product Photography Setup
You now have a toolkit of advice and tools at your disposal to improve your product photography. You are not required to make all of these adjustments at once, trial and error will get the desired results in time. But if you get the hang of it, you’ll be able to use your product photography to not only capture stunning product shots, but also to build a visually appealing brand.

Magdalena Polka is a Business Solution Designer and an Information Technology / Project Management consultant and author with over 15 years of software development, management and project management experience.


